Interface monitoring: Idoc monitoring…

The generic interface monitoring setup in SAP Focused Run is explained in this blog. This blog will zoom into monitoring of Idocs.

Idoc monitoring

SAP Focused Run can both report on idoc errors and delays in idoc processing. Delay in idoc processing can cause business impact and is sometimes hard to detect, since the idocs are in status 30 for outbound, or 64 for inbound, but are not processed. SAP Focused Run is one of the only tools I know who can alert on delays of idoc processing.

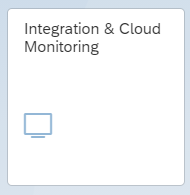
The monitoring starts with the Integration & Cloud monitoring tile:

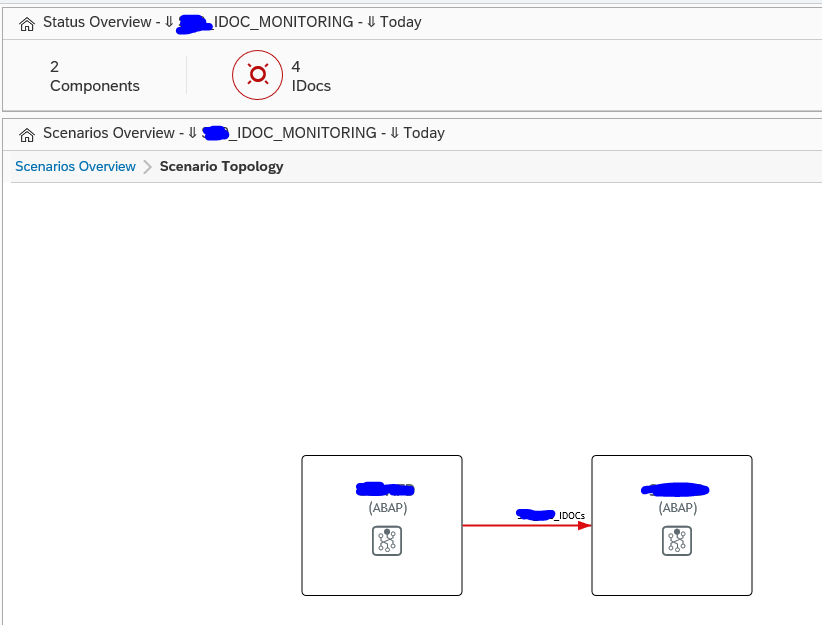
Then select the modelled idoc scenario (modeling is explained later in this blog):

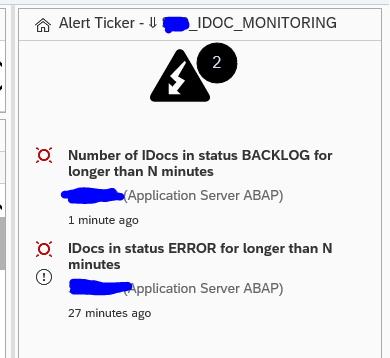
On the alert ticker you can already see there are alerts for both idocs in error, but also alerts for idocs in delay:

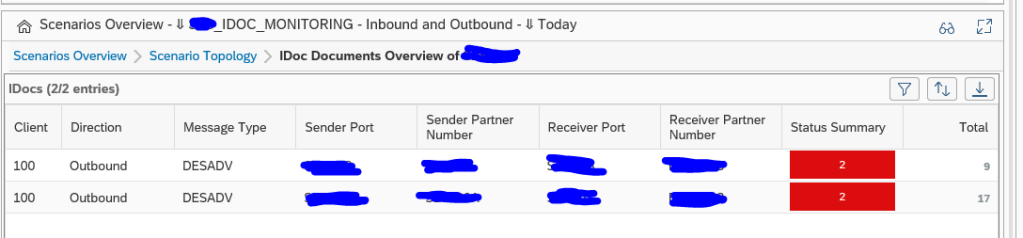
In the main overview screen click on the interface line to get the overview of idocs sent:

You can now see the amount of idocs that were sent successfully, which are still in transit and which ones are in error. Click on the number to zoom in:

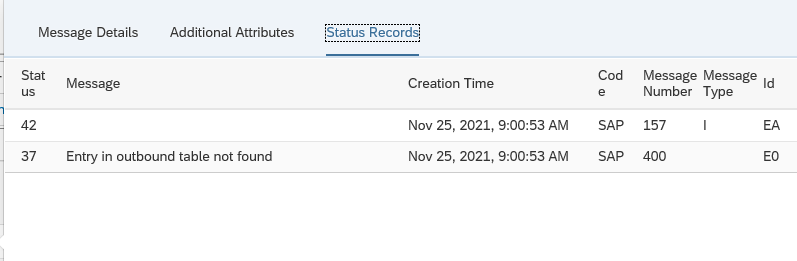
Click on the red error bar to zoom in further to the numbers:

Click on the idoc number to get further details:

Unfortunately, you cannot jump from SAP Focused Run into the managed system where the idoc error occurred.

Documents monitor

A different view on the idocs can be done using the documents monitor. You can select the documents monitor tool on the left side of the screen:

Now you goto the overview:

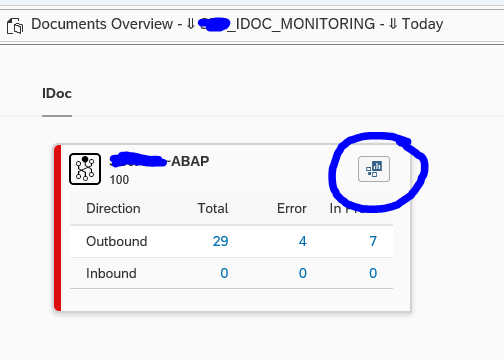
You can click on the blue numbers to dive into the details. Or you can click the Dashboards icon top right of the card to go into the dashboard mode:

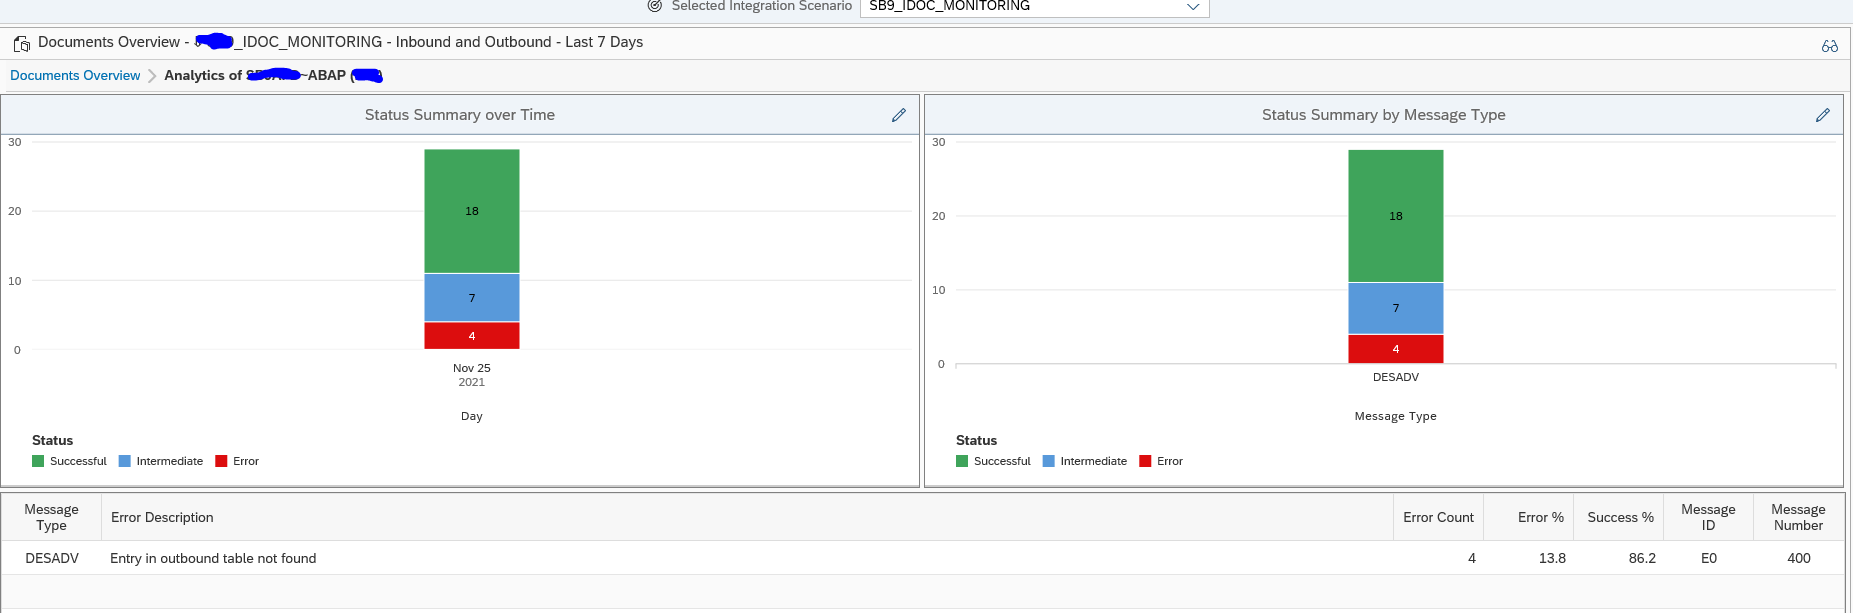
This will show you the summary over time and per message type. Clicking on the bars will again bring you to the details.

Data collection and alerting setup

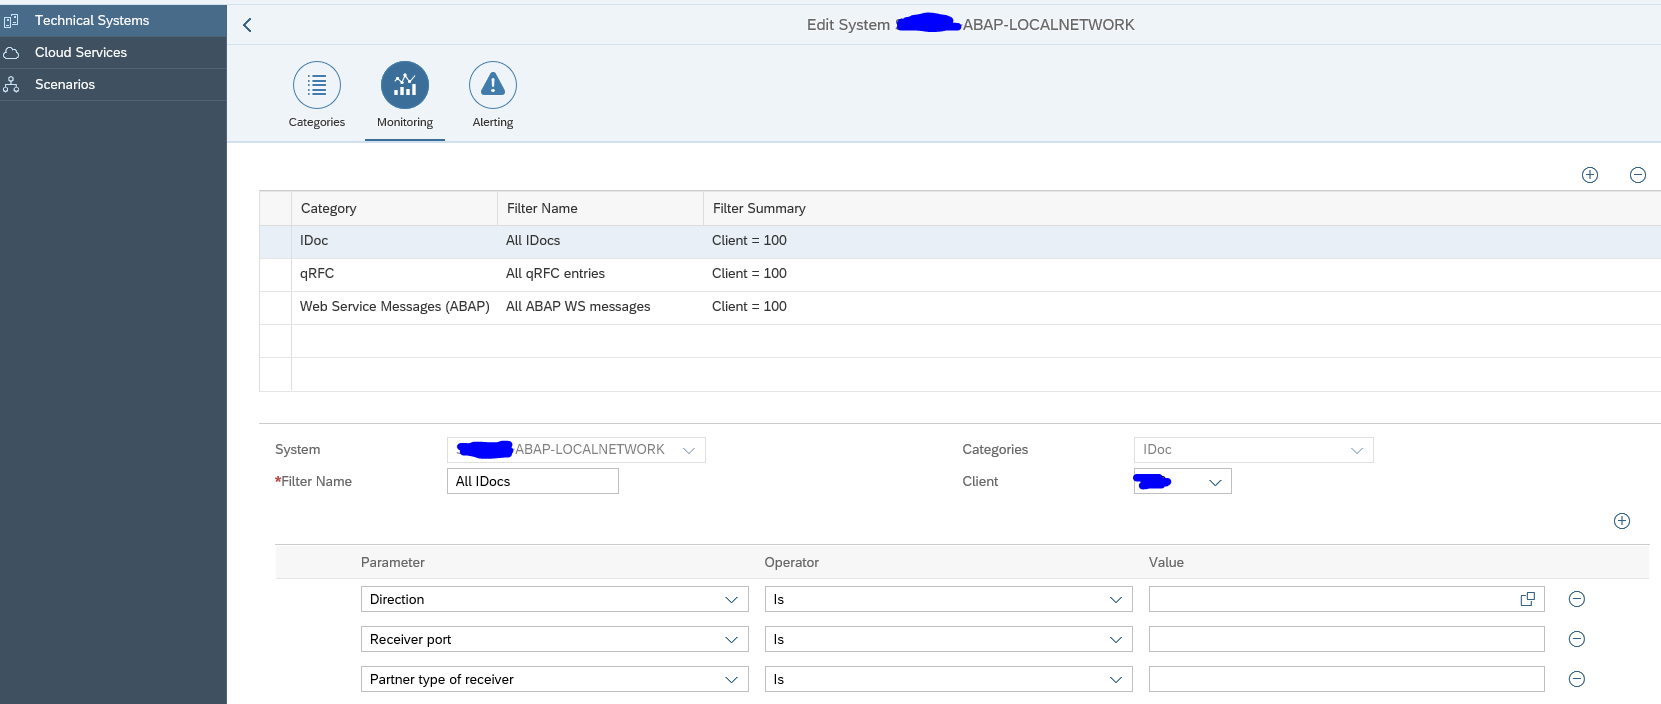
In the configuration for interface monitoring in the Technical System settings, goto the monitoring part and activate the data collection for Idoc monitoring:

In the monitoring filter, you can restrict the data collection to certain idoc types, receivers, senders, etc. Or leave all entries blank to check every idoc:

Alerting for errors

First alert we set up is the alert for errors.

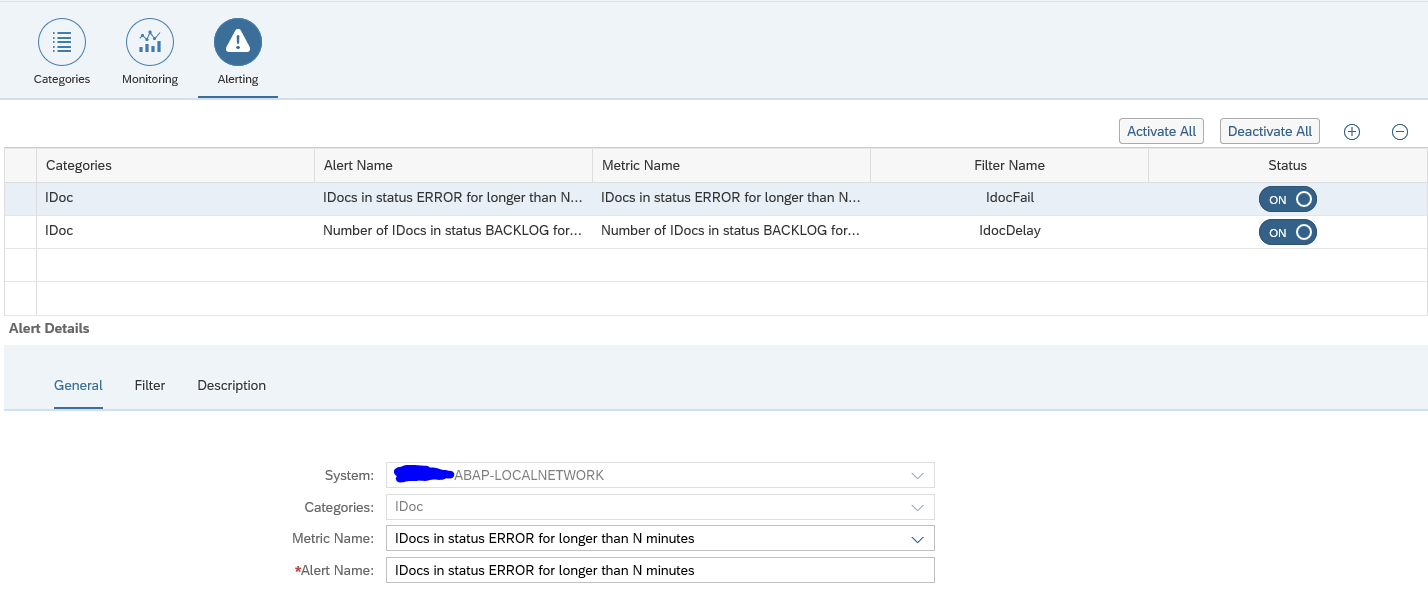
Create a new alert and select the alert for idocs in status ERROR for longer than N minutes:

Now we add the filter. In our case we filter on outbound idocs of type DESADV:

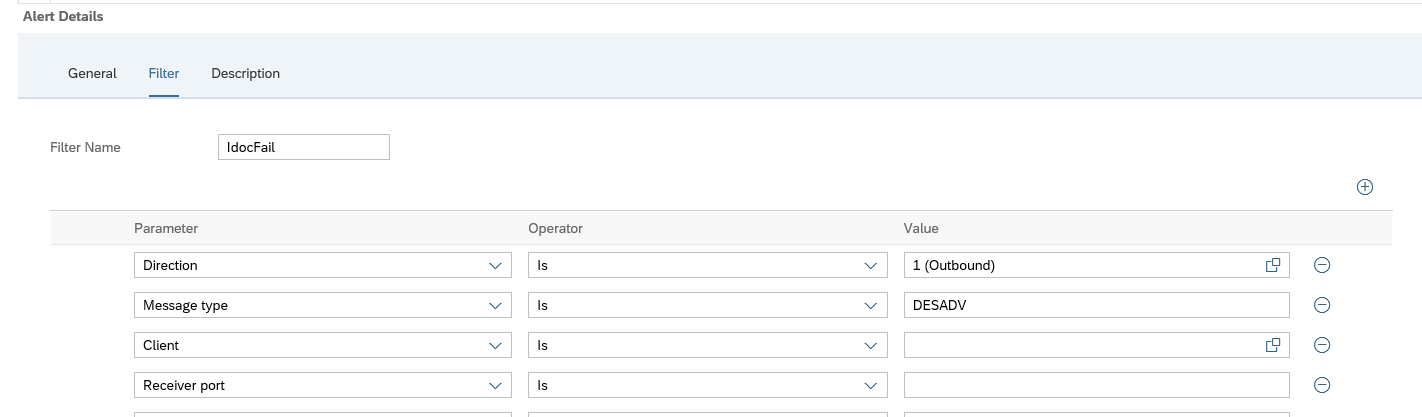
A bit hidden at the bottom of this screen is the setting for the N for the minutes:

The time setting is depending on your technical setup of idoc reprocessing jobs (see for example this blog), and the urgency of the idocs for your business.

In the description tab add the notification variant in case you want next to the FRUN alert also mail to be sent (setup is explained in this blog):

You can set up multiple alerts. This means you can have different notification groups for different message types, different directions, different receiving parties.

Save the filter and make sure it is activated.

Alerting for Backlog

Next to alerting on errors, Focused Run can also alert on delay of idocs. This can be done for both inbound and outbound idocs.

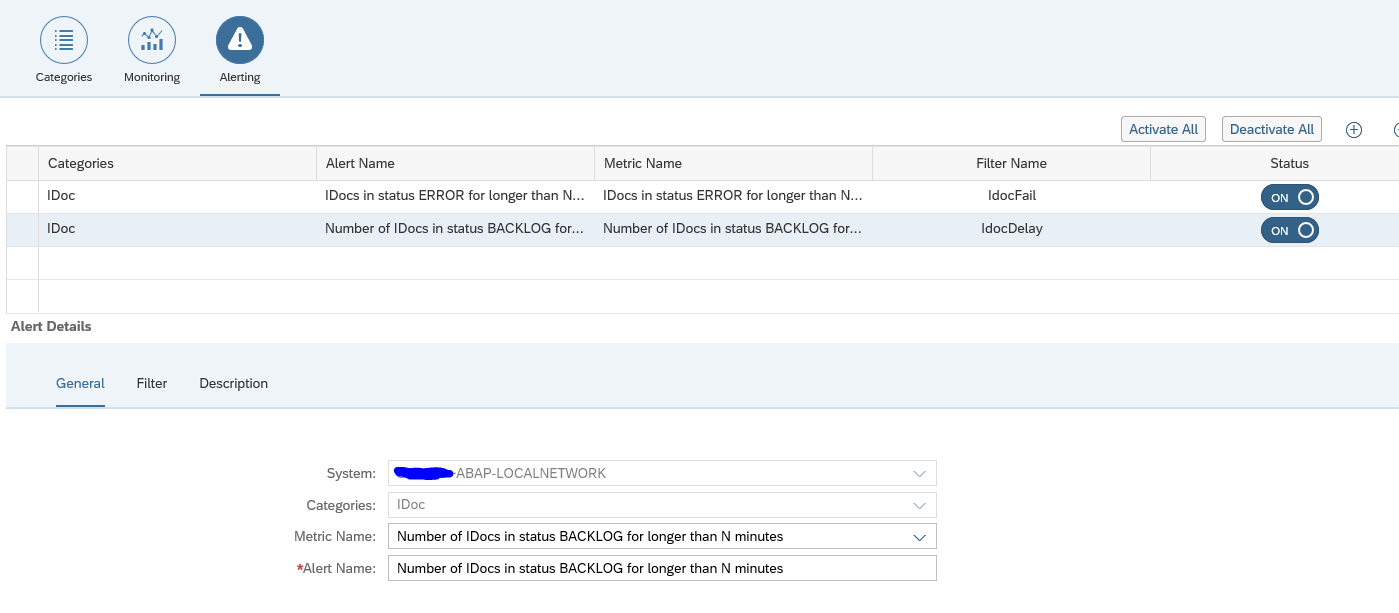
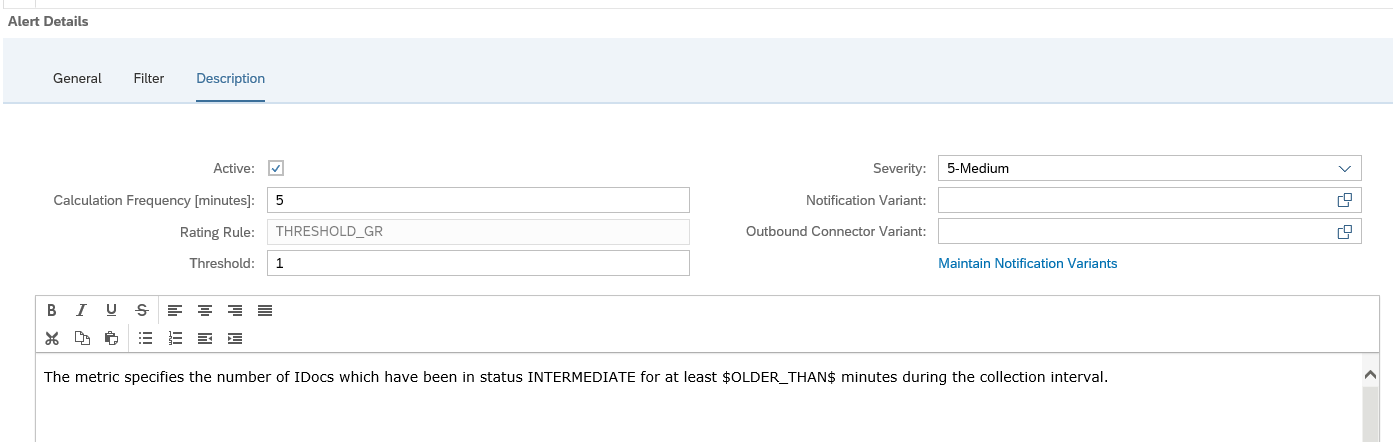
To set up an alert for backlog choose the option idocs in status BACKLOG for longer than N minutes:

In the filter tab set the idoc filter and at the bottom fill out the value for N minutes of backlog that should be alerted:

And in the final tab set the notification variant if wanted:

Save the filter and make sure it is activated.

Determination of delayed and error idocs

On the SAP Focused Run expert portal on idocs, there is this definition of the determination of idocs in delay and error:

Graphical modelling

The graphical modelling of idoc monitoring is identical in principle as with RFC and qRFC. You can read the set up in these two blogs: qRFC and RFC modelling.

Data clean up

If you get too much data for idoc monitoring, apply OSS note 3241688 – Category wise table cleanup report (IDOC, PI). This note delivers program /IMA/TABLE_CLEANUP_REPORT for clean up.

Security & configuration validation check for client 001 and 066 existence…

Security & configuration validation can be used to check for the existence of clients 001 and 066.

The 066 early watch client and old delivery clients 001 are only security risks (unless in rare cases 001 has been chosen as execution client). Best to delete them from security point of view (see reference blog).

Setting up security and configuration validation rule to check for existence of clients 001 and 066

Go to the security and configuration validation policy tile:

Create a new policy with the following syntax:

<?xml version="1.0" encoding="utf-8"?>
<targetsystem xmlns:xsi="http://www.w3.org/2001/XMLSchema-instance" desc="Test CLIENTS Store" id="TEST_CLIENTS" multisql="Yes" version="0000" xsi:schemaLocation="csa_policy.xsd">
  <configstore name="CLIENTS">
    <checkitem desc="CLIENTS_CHECK" id="1.0.0.0">
      <compliant>MANDT = '000' or MANDT = '010' or MANDT = '100'        </compliant>
      <noncompliant> MANDT = '001' or MANDT = '066' </noncompliant>
    </checkitem>
  </configstore>
</targetsystem>

In the compliant section add more clients that are valid and/or change the numbers to your own situation.

Basically the rule says: 000 and main client(s) listed are compliant. 001 and 066 are not compliant.

Running the check


Run the check will give you all existing 001 and 066 clients as incompliant items:

Monitoring Host Agent PSE Certificate Expiry…

Purpose

You have configured SSL for enabling secure connections to SAP Host Agent. In such a case you need to regularly update or extend the validity of the SAP Host Agent PSE certificate. With Focused run System Monitoring you can create custom metric for monitoring SAP Host Agent PSE certificate expiry.

Setup

Step1: Navigate to Host Template maintenance

SAP Host Agent resides at OS level of each host of systems that you are monitoring using Focused Run. Hence you need to monitor the PSE certificate for SAP Host Agents of each host in your customer network.

In our recent blog we have explained how you can configure URL Certificate monitoring in Health Monitoring in SAP Focused Run. However configuring certificate monitoring for each SAP Host Agent in your customer network using Health Monitoring will be very cumbersome.

An easier way will be to setup a custom metric in the host level system monitoring template which when activated will be automatically applied to all hosts for which the monitoring template is used.

For template maintenance you can navigate to System Monitoring Template Maintenance app on the Focused Run launch pad.

In the template maintenance app navigate down to the Host (Server) node and then to the respective template which you want to edit and click on Edit button.

Step2: Create Custom Metric

In order to create a custom metric you need to activate expert mode. For this click on the Expert Mode button as shown below.

After enabling expert mode you can click on Create button. Select Metric in the drop down from Create button.

In the Metric creation pane, under Overview tab enter the details as shown below.

Then in the Data Collection tab, provide the details as shown below.

For the URL field you need to mention the URL https://$SAP_ComputerSystem.FQDName$:1129/SAPHostControl/?wsdl in which the expression $SAP_ComputerSystem.FQDName$ will dynamically resolve the respective FQDN of the host picked up from LMDB. Hence it is important to select the check box under Placeholder and select LMDB under Placeholder type.

Then navigate to the Threshold tab and provide the threshold as shown below. In this example the threshold is Yellow if certificate is expiring in 30 days and Red if its expiring in 15 days.

Then click on Next button to navigate to the Assignment tab where we assign this metric to an existing alert. In this step just click on the Finish button to save the metric. In this step we don’t assign to any alerts yet as we are yet to create a custom alert for this custom metric.

Step3: Create custom Alert and assign to custom Metric

In the expert mode maintenance go to the Create button and then from the drop down select Alert.

Enter the details as shown below and click on Next button.

Then in the Assignments tab you will see the custom metric you just created. Select the check box for this metric and click on Finish to save the alert.

Now your custom metric is ready together with alerting active.

To activate this template update on all hosts navigate to Managed Objects tab for the template and click on Apply and Activate button.

Upon activation the new metric will be available in system monitoring as shown below.

For more details on how to setup SSL for SAP Host Agent you can refer to the SAP documentation here.

IT Calendar access for Non-SAP Focused Run Users…

The work mode management function is use to maintenance. During the maintenance the alerts are suppressed. The same information can also be made generally available to serve as a IT calendar for all interested persons. This can be people for the IT department and the business. These users are mainly interested in planned downtime of the IT systems.

Use of the IT calendar for non-SAP focused run users

After the setup each person can now use this URL:

https://<host>:<port>/sap/bc/ui5_ui5/sap/itcal_external/index.html? FILTER_VARIANT=<public_variant-name>&sap-client=<client>

End result looks like this:

Setup of IT calendar access for non-SAP focused run users

The basic steps are described in OSS note 2926433 – IT Calendar access to Non-SAP Focused Run Users.

Create a system user with copy of role SAP_FRN_APP_ITC role and update it with the UI5 application “itcal_external”(IWSG and IWSV).

Also add these 4 not documented authorizations:

Display for service availability management:

Display for work modes:

Add generic services:

Add filter bar rights:

Activate these 2 SICF services:

  • /default_host/sap/bc/bsp/sap/itcal_external
  • /default_host/sap/bc/ui5_ui5/sap/itcal_external

On the Logon tab of these 2 services set the user ID and password of the newly created system user.

Do the same for the external system alias /sap/itcalnonsolman (also in SICF transaction): also here set the user ID and password for the newly created system user.

After settings are done, execute testing. Most issues are coming from lack of auhtorizations.

OSS notes

Relevant OSS notes: